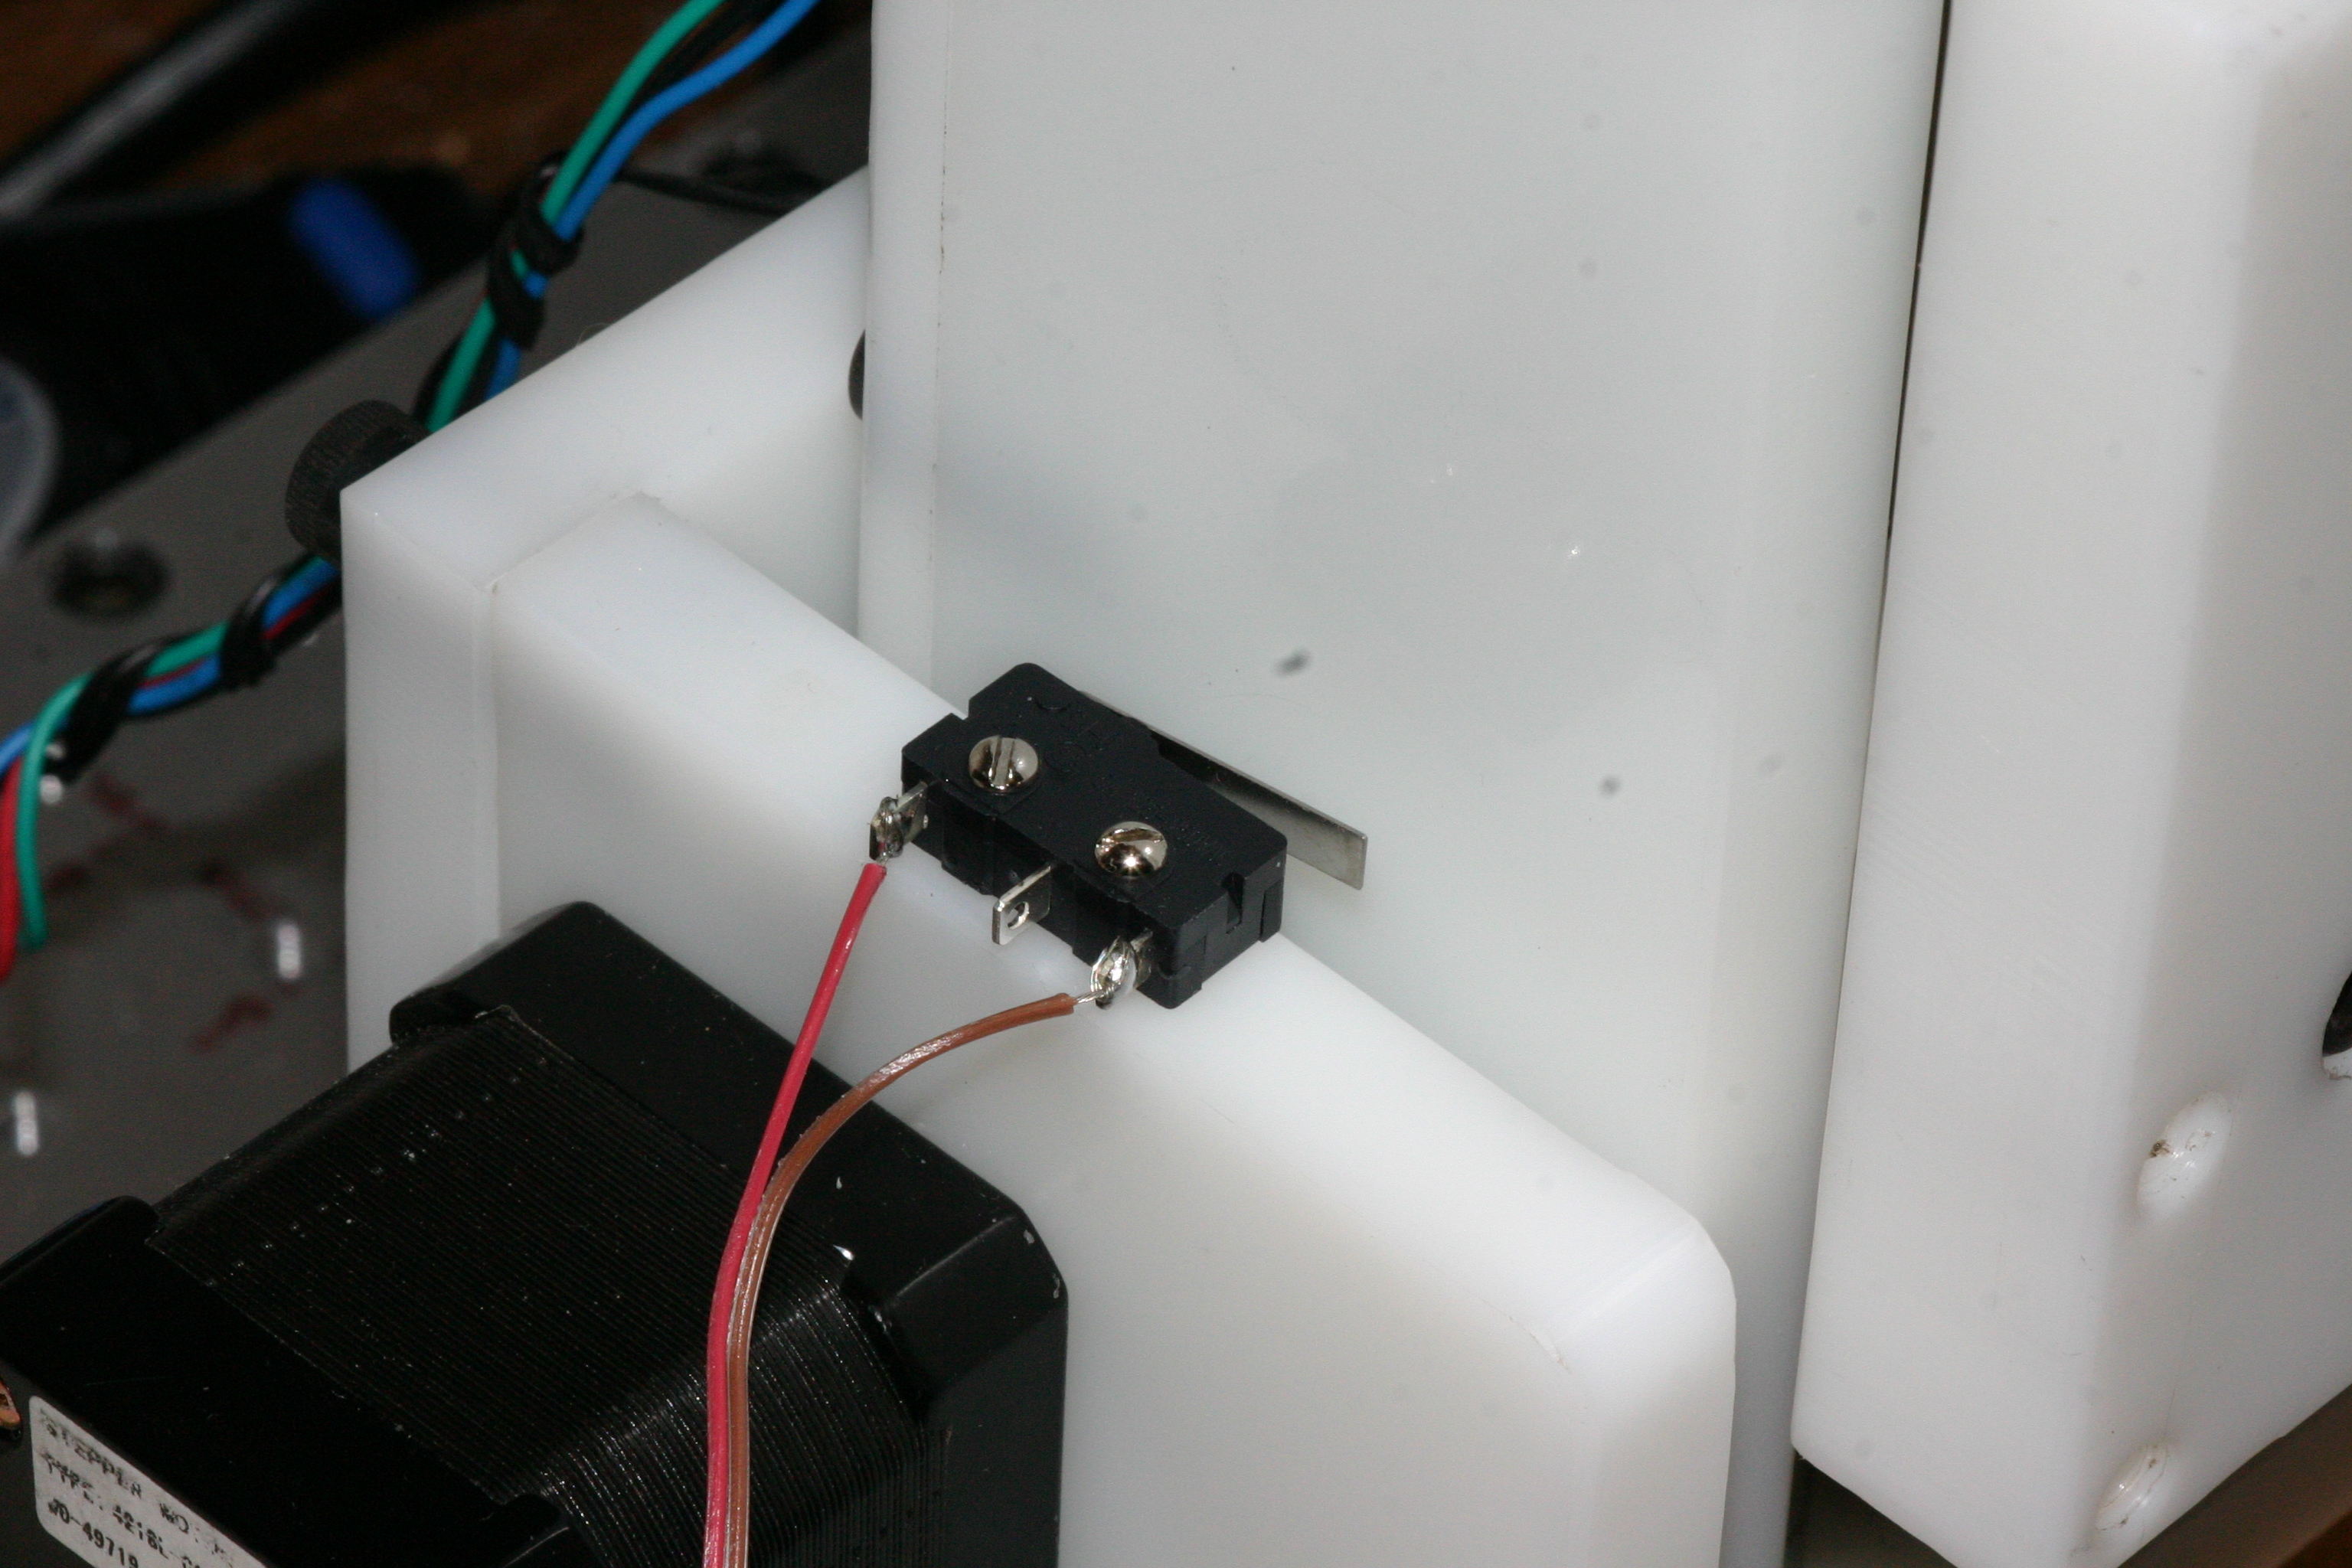
The X and Z axis have relatively sane places to put the switch, but the Y axis provided a little bit of a puzzle. The solution was to cut a notch in the Y-axis gantry so that the switch would fit in the narrow space between the gantry and the box that forms the base of the machine.
I notice that in the newest zenbot machines, the left and right sides of the box are gone, with the front and back pieces held in place by the machine table. Maybe I could have done that on my zenbot as well, if I'd thought of it in time.
I intend to also add a Z-axis home switch, but for now the tool length sensor is far more useful.
The home switches are repeatable to under 1/1000 of an inch, which is plenty good for cheap microswitches. I probably should remove the lever from the X axis switch, but not before I do some comparisons to see whether it actually makes a difference.
(originally posted on the AXIS blog)
Entry first conceived on 6 August 2008, 1:29 UTC, last modified on 15 January 2012, 3:46 UTC
Website Copyright © 2004-2024 Jeff Epler

